How to use smoothing groups in 3D Studio Max
Smoothing Groups. Smoothing groups are a way to make a low poly model look lmore detailed than it is. Sometimes the shading on a model is too soft and does not define your model well. Or you have a weird smoothing issue that you wish to resolve. That's what smoothing groups were created for.
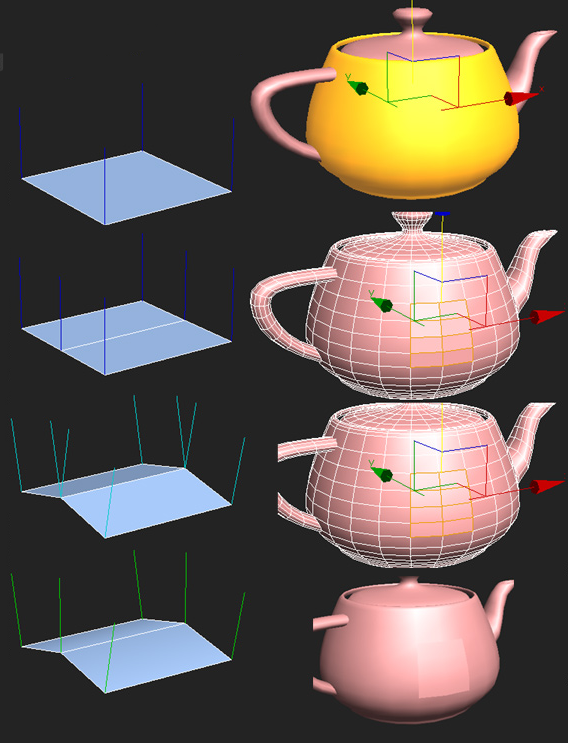
Normals. Normals control the smoothing of the object. Every face has a normal at each of its vertices. The blue lines (see image) represent the direction the normals are facing for each vert. In the third example, you can see that when two faces have different normals on the verts they share, the shading is faceted. In the fourth example, where the shared verts have an identical, average normal, the shading is smooth across the two faces.
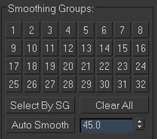
How to you control these normals?. The smoothing group box (see image) is available in the edit poly rollout whenever you are in face, or element sub object mode. You have up to 32 different smoothing groups. To set a face to a smoothing group, select it, scroll down to this box and click down the groups you want it on and click up the groups you don't want on. The clear all button is good for taking all smoothing groups off. Auto smooth is useful as well. Set a degree and any normals where the faces are that degree different or less will be set to the same smoothing group.
Teapot. In this example the teapot was originally all on smoothing group one. I selected the central faces and clicked on 1 to remove it. This resulted in those faces being faceted. The rest of the teapot's faces pay not attention to them when smoothing. Then I put them on smoothing group 2 and they smooth within themselves. Tou can see the two distinct smoothing groups in the last teapot example.
How to you control these normals?. The smoothing group box (see image) is available in the edit poly rollout whenever you are in face, or element sub object mode. You have up to 32 different smoothing groups. To set a face to a smoothing group, select it, scroll down to this box and click down the groups you want it on and click up the groups you don't want on. The clear all button is good for taking all smoothing groups off. Auto smooth is useful as well. Set a degree and any normals where the faces are that degree different or less will be set to the same smoothing group.
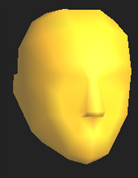
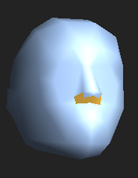
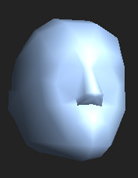
Real world example. On this head the nose was not smoothing in a pleasing manner. So I took the bottom faces of the noce off of 1. Then I put them on 2. You can see that fixed the bottom but made a new problematic seam around the tip of the nose where they were not averaging with the top of the nose. I took the surrounding faces I did want averaged with then and added to 2. Now the bottom is sharp and the top is smooth.