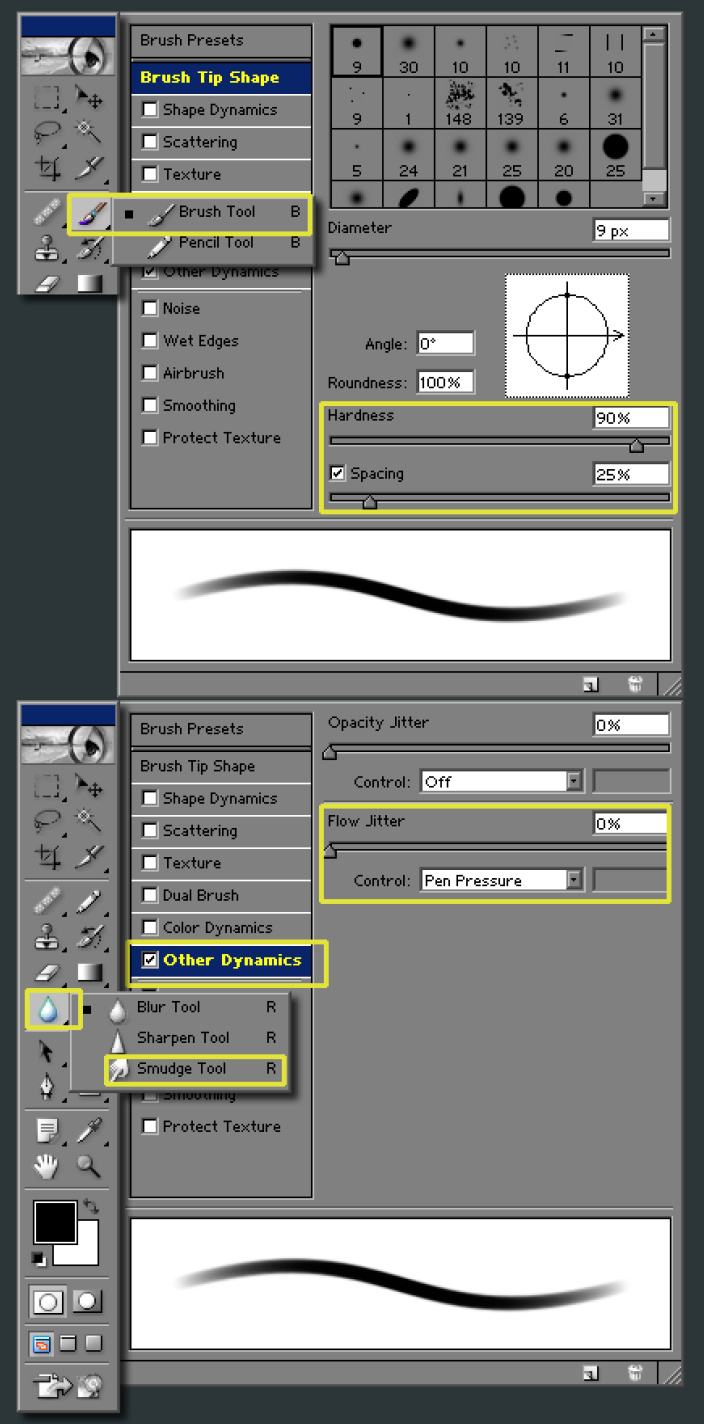
Standard photoshop paintbrush. Hokey = B. Click and hold over the brush icon to expand the menu like in the example image to the right. Alternatively you can hit B, then hit Shift+B to cycle to the next tool in the list. For the brush there is only two choices, so it works as a toggle between pencil and brush.
Opacity and Flow are set to 100%

In the Brush presets, Hardness is set to 90%, spacing 25%. The only other brush preset is under “Other dynamics”. There, Flow is set to be controlled by the pen pressure of the tablet input device (assuming their is one present).
Smudge tool. Hotkey = R. Click and hold over the blur icon to expand the menu like in the example image to the right. Alternatively you can hit R, then hit Shift+R to cycle to the next tool in the list. For the blur tool there are three choices, so it cycles between blur, sharpen and smudge. The brush pre-sets for smudge are almost identical to the settings for the paintbrush, except that hardness has been lessoned to 0% and Flow Jitter changes it’s heading to “Strength” but is located in the same place and is still set to pen pressure.
Layer masks are used extensively and a tutorial can be found on mask usage here.
Image adjustment options > Brightness/Contrast, Image Size, and Rotate
Canvas > Flip Horizontal
Edit options > Free Transform
Filters > Add Noise
Guides - In photoshop, you can display rulers at the top and sides of your image. To toggle the visibility of rulers, hit ctrl+.

In addition you can click inside the ruler and drag out guides. These are vertical or horizontal blue lines that allow you to line things up, and use to snap things to.

In order to snap to the rulers, you have to make sure snap is checked. The shortcut key to toggle snap is is ctrl+shift+; If you want to toggle the visibility of guides, hit ctrl+h. An added bonus, is that the marquee, or marching ants that show your selection, is considered an extra. This means you can hide your selection area so it doesn’t disturb your ability to judge the effect you are currently doing.
Cloning - When you select a portion of a layer or a mask, you can clone it by holding the alt key when you drag it with the mouse, or move it with the arrow keys. You can hold down shift when dragging to constrain the movement to up or down movements only.
